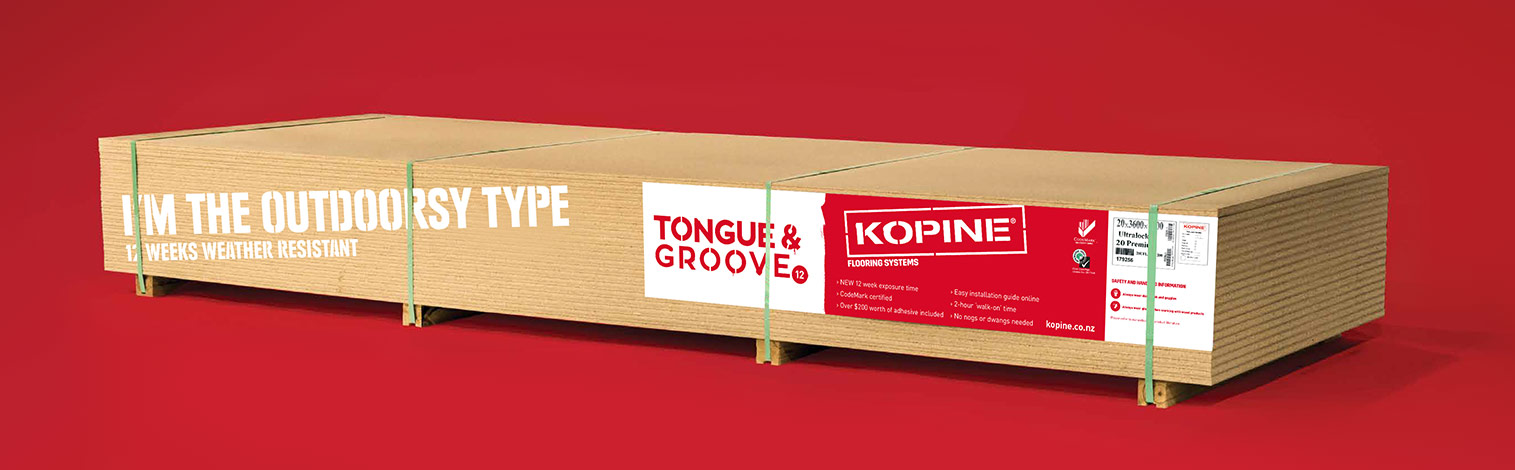
Let's Crack Into It!
Watch the video or follow the step-by-step instructions for Tongue & Groove below.
WHAT YOU NEED
- Holdfast Gorilla Grip for glueing the edges – supplied with the board at no extra cost.
- No. 8 gauge x 50mm countersunk screws (recommended)
- Rubber mallet
or
- A minimum of 65mm x 2.8mm hot-dipped galvanised annular grooved flooring nails if you’ve got a nail gun and know how to use it.
or
- A minimum of 60 x 2.8mm hot-dipped galvanised jolt head nails or 60 x 3.15mm hot-dipped galvanised csk annuler grooved flooring nails (if you’re old school and using a hammer)

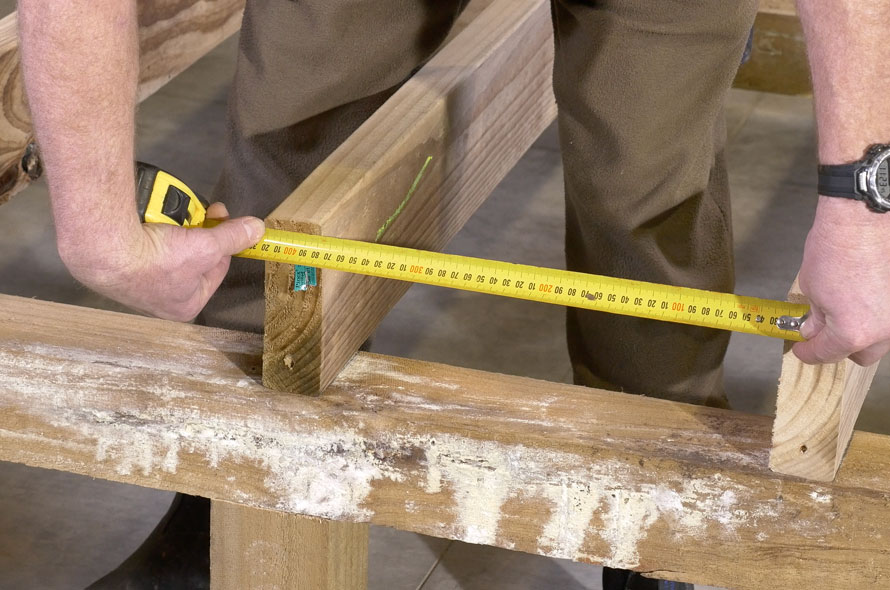
STEP 1
Joint spacing
-
Joists should be no wider than 600 mm centres – the closer the joists the more rigid the floor.
-
The sheet must be a continuous span over at least three joists.
-
Whack some nails into the joist to guide your first panel into place.
NOTE: You’ll need to allow for an 8mm expansion gap at the edge of any panel that’s going to collide with a masonry wall or other serious obstacle.
 400-600mm centres
STEP 2
Glue the joists
-
Put a generous amount of glue on the joists underneath where you’ll lay your first panel.
-
If you’re laying panels at a floor edge, this must be supported by blocking.
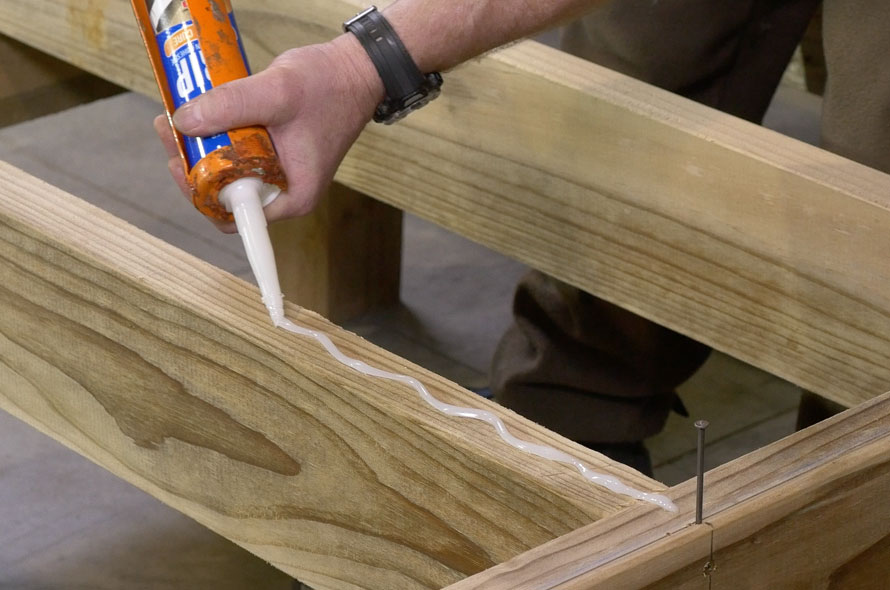 Glue generously along edge
STEP 3
Lay and fix the first panel
-
Make sure the panel edges are square, and free from dirt.
-
Take a straight, square line from one corner of the floor and lay the first panel down this line, across the glued joists.
-
Screw it down – 15mm in from the edge to avoid the plastic tongue and at 150 mm centres along the short-edge of the sheets and around the floor edge. For intermediate joists, use 200 mm centres.
Note: Completely fix sheets when you lay them down – corner fixing is shabby and not enough to hold the panels as the glue cures.
 Allow 8mm expansion gap
 Screw 15mm in from edge
STEP 4
Glue and fix the remaining panels
Note: Gorilla Grip adhesive works best in conditions above 10C though can be used down to 5C. If you move the panels apart after 15 minutes, you’ll need to put some fresh glue on before you rejoin them.
-
Apply a generous amount of glue (5mm diameter) to the top and bottom of the plastic tongue and right around all edges of the panel at the join. This stuff cures fast so don’t mess about. Fix the next panels within 15 minutes of the glue being applied.
-
If you’ve done it right, the glue squeezes out of the top of the joint when you push the next panel in to join up
-
Lay sheets in a staggered, brick-like pattern with panels at right angles to the joists, making sure you glue all edges and the joists underneath – this will stop the squeaking and peaking (and any squealing from the client).
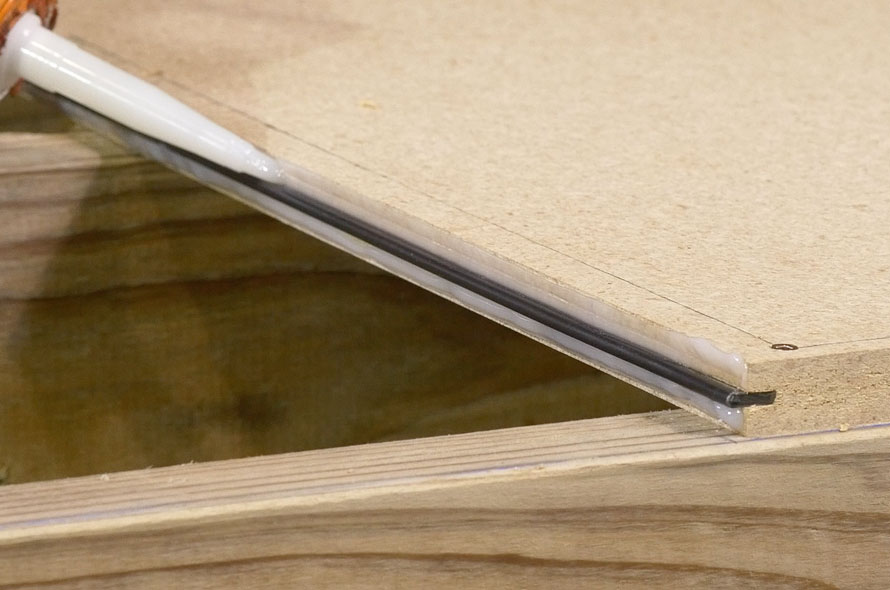 Glue generously along edge
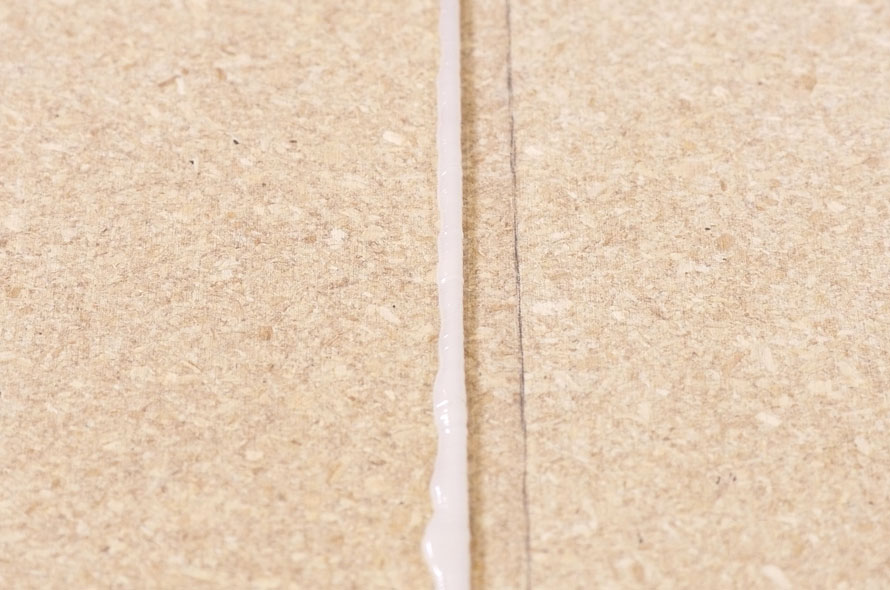 Excess Glue means it's right
STEP 5
Take a 2 hour smoko!
-
Scrape off excess glue on the joint to leave a smooth surface.
-
Don’t walk on the joints for a minimum of two hours after you’ve glued – especially if joists are at 600mm centres or in cold conditions.
-
If you have to walk over it, lay planks across or walk across the joists only.
 Job Done!
